Photos by Christine Han
Homemade cinnamon rolls never seem like a project you can undertake in the morning and have ready in time for breakfast, right? All those ingredients to measure out, kneading in a stand mixer, and of course, two rises for the yeast to do its thing. It’s no wonder we’re also picking them up from a bakery, IKEA, and even that chain in the mall.
What if I told you that you could put a big pan of cinnamon rolls together in about the same amount of time it takes for your oven to heat? With just seven ingredients (all staples you can keep in your pantry and fridge), you can make fragrant iced cinnamon rolls without a stand mixer, prolonged kneading, or rising time. Let’s make this magic happen!
Say Goodbye to Yeast
Traditional cinnamon rolls get their signature tender, doughy texture from a rich yeasted dough. They’re pillowy-soft, like a cinnamon-scented pillow, but all of this comes at a price: time. Yeast needs lots of time to rise properly, and cinnamon rolls usually need two rises: once when the dough is made, and once more after the rolls are formed.
Trade in Yeast for Self-Rising Flour (or a Substitute)
To make these easier cinnamon rolls a feasible breakfast option, we ditched the yeast in favor of self-rising flour. Self-rising flour is a combination of all-purpose flour, baking powder, and salt. There’s enough baking powder in there to give these cinnamon rolls a nice puff and lift. The finished cinnamon rolls won’t be as pillowy as their yeasted cousins, but they are still plenty soft and have a great texture.
This easy dough is a mixture of the self-rising flour, sugar, milk, and melted butter, and it’s just stirred together in a big bowl. The dough is kneaded by hand ever-so-briefly (and by briefly, I mean about a minute), but it has such a great texture that you can roll it out immediately too.
The Finishing Touches for Cinnamon Rolls Are Key
After the dough’s rolled out, the next steps are pretty much like most other cinnamon roll recipes: Brush the dough with butter, sprinkle with plenty of cinnamon-sugar, then roll it into a log and cut into rounds.
Homemade cinnamon rolls go fast, so we use our trusty 9×13-inch baking dish here to make 15 good-sized rolls. More is a good thing when it comes to cinnamon rolls.
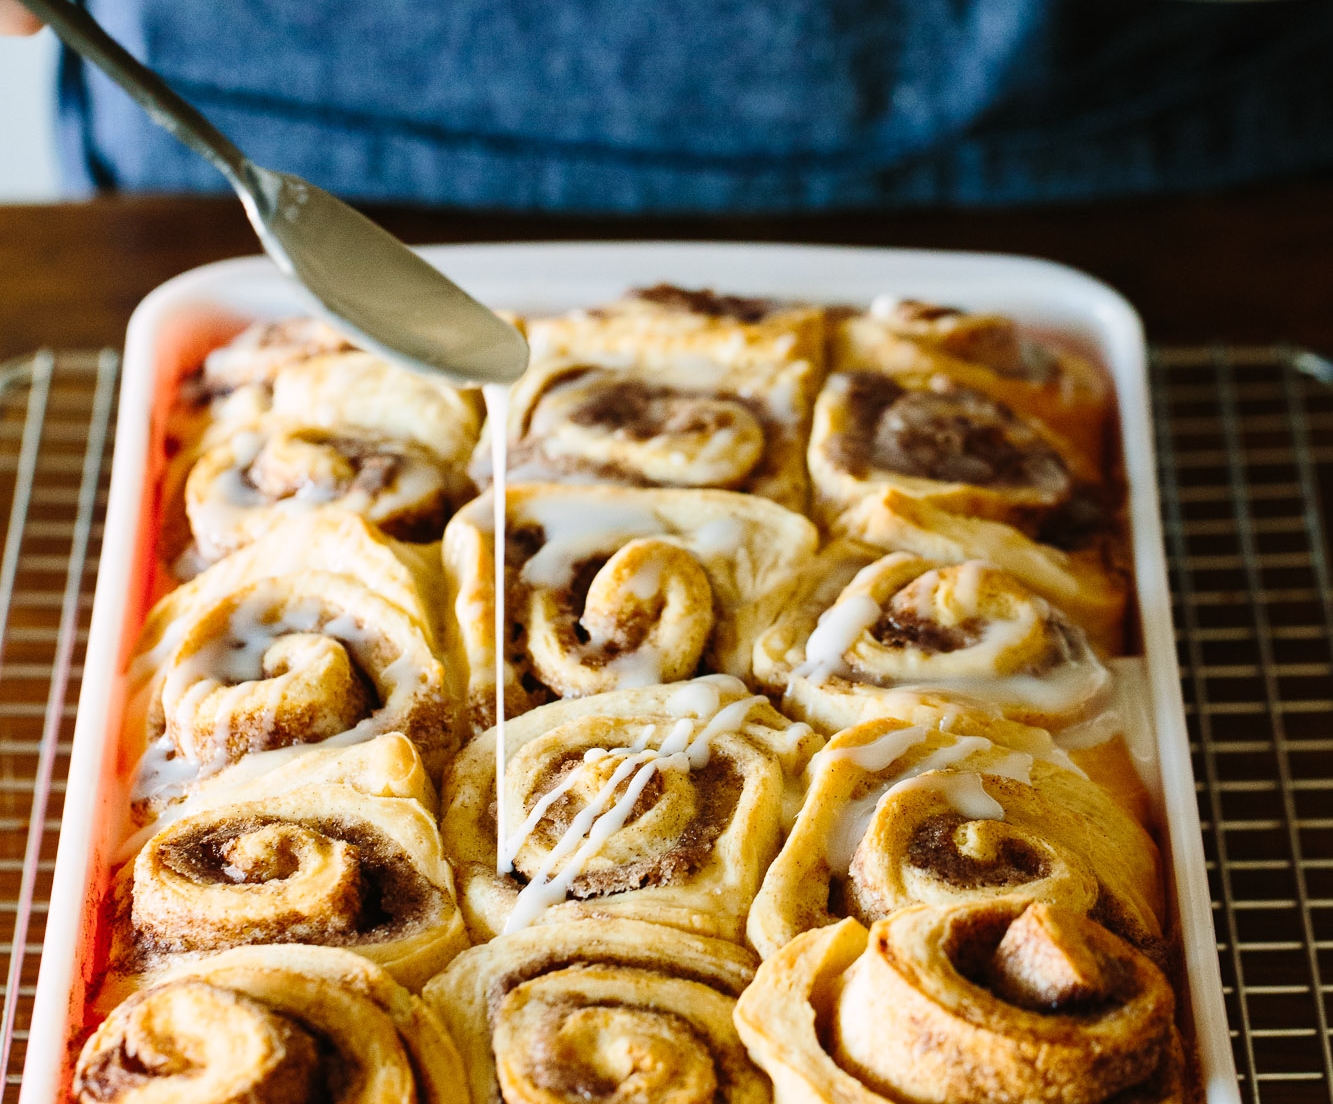
While the rolls are baking, whisk together a simple icing of powdered sugar, milk, and salt to glaze the finished rolls with when they come out of the oven. For those who prefer a cream cheese glaze, give Faith’s version a try.
Fresh, warm, homemade cinnamon rolls are waiting for you — just grab a bag of self-rising flour and give these a whirl!
How To Make the Easiest Cinnamon Rolls
Yield: Makes 15
Ingredients
For the cinnamon rolls:
- Cooking spray or butter, for coating the pan
- 3/4 cup granulated sugar, divided
- 1 tablespoon ground cinnamon
- 5 cups self-rising flour, plus more for dusting
- 2 cups whole or 2% milk
- 8 tablespoons unsalted butter, melted, divided
For the glaze:
- 2 cups powdered sugar
- 1/4 cup whole milk or 2%, plus more as needed
- 1/4 teaspoon fine salt
Equipment
- Mixing bowls
- Measuring cups and spoons
- Rubber spatula or wooden spoon
- 9x13-inch baking dish
- Brush
- Knife
- Whisk
- Bench scraper
- Rolling pin
- Wire cooling rack
Instructions
Heat the oven. Arrange a rack in the middle of the oven and heat to 350°F. Coat a 9x13-inch baking dish with cooking spray or butter; set aside. Make and fill the rolls while the oven is heating.
Mix the filling. Mix 1/2 cup of the sugar and the cinnamon together in a small bowl; set aside.
Make the dough. Place the flour and remaining 1/4 cup sugar in a large bowl and whisk to combine. Mix the milk and 4 tablespoons of the melted butter together in a medium bowl. Add the milk mixture to the flour mixture and stir with a rubber spatula or wooden spoon until a soft dough forms and no dry bits of flour remain.
Knead the dough. Transfer the dough onto a generously floured work surface. Sprinkle with more flour, then knead until the dough is fairly smooth, sprinkling with more flour as needed to prevent sticking. Do not overknead or the cinnamon rolls will be tough.
Roll the dough out. Flour a rolling pin and roll the dough into a 24- by 10-inch-long rectangle about 1/4-inch thick, with the longer side facing you.
Fill the dough. Brush 2 tablespoons of the melted butter onto the surface of the dough, using it all. Sprinkle it evenly with the cinnamon-sugar mixture, leaving a 1/2-inch border.
Roll the dough up. Starting at the long end closest to you, roll the dough up tightly into a log, using a bench scraper as needed to help release the dough from the work surface. Pinch the seam together at the top.
Cut the dough. Position the log seam-side down. Cut the dough crosswise into 15 pieces.
Fill the baking dish. Place the cut rolls cut-side up in the baking dish, 5 across and 3 down the dish.
Butter the rolls. Brush the tops of the cinnamon rolls with the remaining 2 tablespoons of melted butter.
Bake the rolls. Bake until puffed, golden-brown, and a toothpick or skewer inserted in several spots comes out clean, about 35 minutes. Meanwhile, make the glaze.
Make the glaze. Place the powdered sugar, milk, and salt in a medium bowl and whisk until smooth; set aside.
Glaze the rolls. When the cinnamon rolls are ready, place the baking dish on a wire cooling rack. Drizzle evenly with the glaze, then let cool 15 minutes before serving.
Storage: Leftovers can be wrapped in plastic wrap and stored in the refrigerator for up to 1 week. Rewarm in a 300°F oven until warmed through, about 10 minutes.