Photo by Parker Feierbach
If you love butter, you’ll live for this brioche bread. This recipe produces two loaves, with each loaf containing a whole stick of butter—so you can imagine how rich each fluffy bite will be.
What kind of yeast should I use? Active dry or instant yeast will both work in this case; because we’re blooming the yeast in the sponge portion of the dough, the type of dry yeast you use has no impact on the final product.
Can I make this dough by hand? Technically, yes, but the stand mixer will truly make your life 100x easier for this recipe. Because of the extensive amount of mixing that's required to develop the gluten properly and the slow, gradual addition of butter, doing this by hand will result in a very long, very arduous process.
This dough seems very wet and sticky! It is a very moist dough! Enriched with lots of eggs and butter for that insanely delicate crumb and fatty goodness, the dough will be quite sticky in the beginning. This recipe uses large eggs measuring about 54 grams each. If your eggs run even larger, use only 5 eggs to avoid an overly wet batter! Trust in the process and have patience to let the gluten develop fully before adding in the butter.
How do I know when the gluten has developed properly? The windowpane test is often used to check for gluten development. To perform the test, take a small piece of dough and slowly stretch it out in opposite directions: if the dough becomes thin enough to appear semi-transparent before it tears, you're there! You’ll have an extra desirable chew in the bread once your dough gets to this stage. If your dough is struggling to pull away from the sides of the mixer, chances are you need to increase the speed on your mixer. Stay nearby the mixer! You might have to hold it in place as it dances across your countertop with vigorous agitation.
How should I add the butter? Slowly and with great patience. The butter addition process should take no less than 10 minutes. If you add the butter in too fast, it will not “emulsify” into the dough and result in an oily, broken dough. It’ll still bake off well enough, but do it right and your dough will look satisfyingly smooth, glossy, and plump.
Should I let the dough rest overnight? It’s up to you! Generally, more time means more flavor when it comes to food. If you let the dough sit in the fridge overnight, it’s basically a slow fermentation that helps it develop a subtle depth of flavor. Because we’re already letting some fermentation happen by using the sponge mixture, overnight proofing is not necessary if you're looking to bake right away. Or, if you’re like me and love freshly baked bread straight out of the oven, bake one loaf on the day of, and save the other half of the dough to bake for the next day!
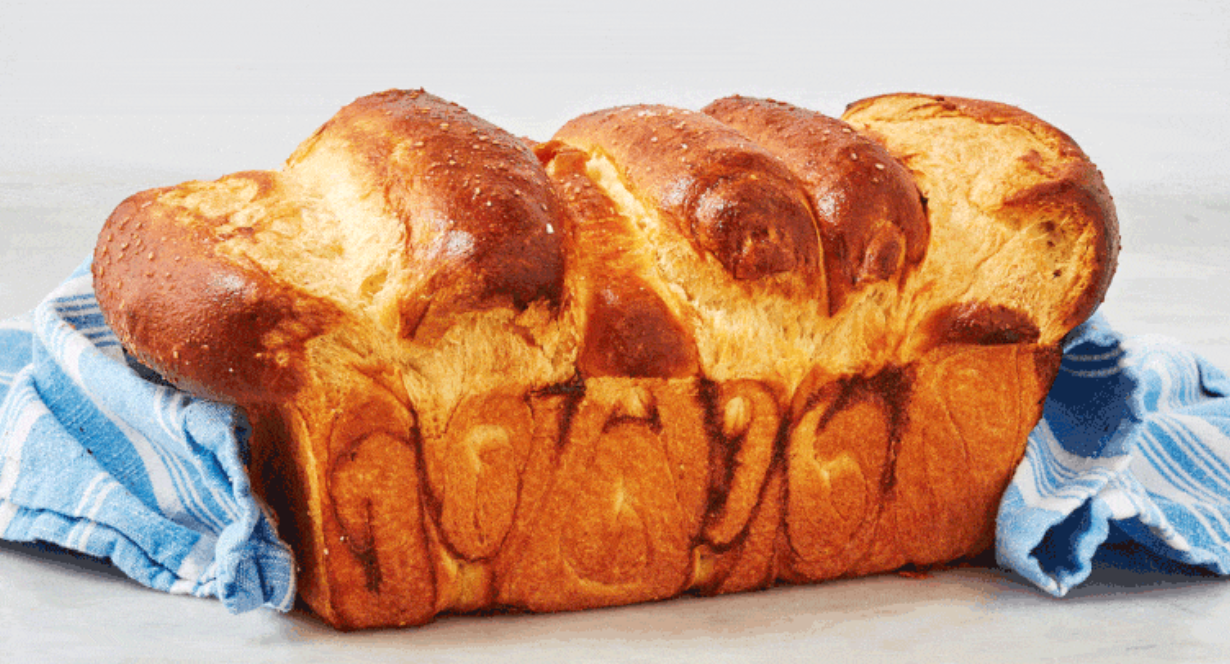
Why do I have to shape with letterfold rolls? You don’t have to, but I simply love shaping my softer breads like this for an easy pull-apart feature once baked: you won’t even need a knife to get a perfect slice of fluffy heaven.
If you’re a bread fiend, check out our sourdough bread recipe as well!
Brioche Bread Recipe
Ingredients
For the sponge
1 c. all-purpose flour (128 g.)
1 (0.25-oz.) packet or 2 1/4 tsp. active dry yeast (7 g.)
1/2 c. milk, lukewarm (120 g.)
For the dough
6 large eggs, room temperature (320 g.)
3 c. all-purpose flour (384 g.)
1/2 c. granulated sugar (105 g.)
2 tsp. kosher salt (12 g.)
1 c. (2 sticks) butter, softened, plus more for pans (227 g.)
For the egg wash
1 large egg
1 tbsp. water
Kosher or sea salt, for sprinkling
Instructions
- Make the sponge: To the bowl of a stand mixer fitted with the hook attachment, add 1 cup flour, yeast, and milk. Using a spatula, mix until well combined, then cover with plastic wrap and let sit for 45 minutes.
- Once the sponge has formed some air pockets, add in eggs, remaining 3 cups flour, sugar, and salt. Mix on medium speed until well combined, then gradually increase to medium-high speed and continue mixing until dough pulls away from the sides of the bowl and becomes shiny and elastic, scraping down bowl every 4 to 5 minutes, 10 to 13 minutes.
- With the mixer running, add in butter gradually, 1 tablespoon at a time, letting each tablespoon fully incorporate into the dough before adding the next, 13 to 15 minutes. Continue mixing on medium-high speed for 5 to 7 minutes until the dough passes the windowpane test. Cover bowl with plastic wrap and let rest about 1 hour or doubled in size.
- To bake next day: Once dough has doubled in size, punch down to deflate dough completely, then re-cover with plastic wrap. Refrigerate overnight until you are ready to bake the next day. Follow instructions in the next step, letting dough proof until doubled before baking, longer if needed, up to 2 hours 30 minutes.
- To bake same day: Once dough has doubled in size, turn out onto a floured surface and punch down dough. Divide in half using a bench scraper. Cut each half into six equal pieces. Flatten each piece into a rectangle, then fold short ends in towards each other as if folding a letter. Flatten again and tightly roll into a log starting with the short end. Repeat with all pieces.
- Grease 8”-x-5” loaf pans with butter. Place 6 pieces of dough seam-side down in one straight row into each prepared pan. Cover with plastic wrap.
- Preheat oven to 375°. Let dough proof until puffy and doubled in size, 1 hour to 1 hour 30 minutes. In a small bowl, whisk together remaining egg and water. Brush egg wash on top of loaf and sprinkle lightly with salt.
- Bake until deeply golden on top and the center of the loaf registers between 190° and 205°, about 30 minutes.
- Let cool 5 minutes then turn loaves out onto a cooling rack. Let cool completely.